7 Egg Cooking Styles You Should Try
Eggs are a staple in kitchens around the world—and for good reason. They’re generally affordable, packed with protein, and incredibly versatile. But how you cook them makes all the difference. The texture of a soft scramble is nothing like the crisp edges of a fried egg or the delicate bite of a poached one.
If you’re looking to sharpen your skills or expand your go-to breakfast options, exploring different ways to cook eggs is a great place to start. In this guide, we’ll explore seven popular methods—from classic to refined—so you can practice key techniques and build confidence in the kitchen.
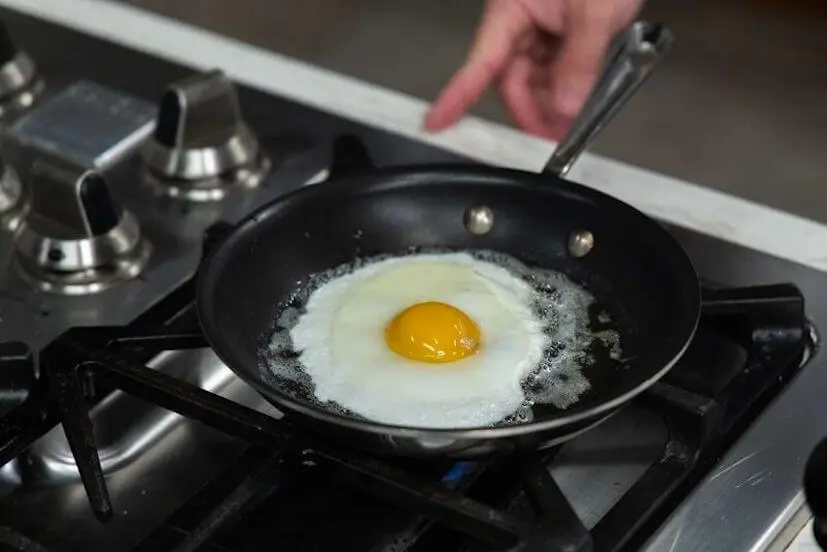
1. Sunny Side Up Eggs
Sunny side up eggs are technically fried eggs, but they’re often listed separately on menus. They have a distinct appearance and texture, which warrants keeping them separate from the others.
Fans of sunny side up eggs enjoy that these eggs are cooked only on one side and have a runny yolk, which is great for dipping your toast or layering on avocado toast. They’re also a quick, simple, and visually appealing breakfast staple.
How Do I Make Sunny Side Up Eggs?
Sunny side up eggs require a precise cooking technique to avoid overcooking and allow the yolk to harden.
1. Melt a bit of butter in a pan over medium heat.
2. Crack an egg into the center of the pan.
3. Turn the heat down and add a lid to help steam the top of the egg white.
4. Remove the egg from the pan after 30-45 seconds when the outside egg white is set.
Common Mistakes When Making Sunny Side Up Eggs (and How to Fix Them)
Even with what may look like simple instructions, sunny side up eggs can be tricky to perfect. Here’s how to troubleshoot a few of the most common issues:
Whites that won’t set:
If the egg whites stay runny on top, try covering the pan with a lid. This traps steam and gently cooks the tops without needing to flip the egg.
Overcooked yolks with undercooked whites:
This often means the heat is too high. Reduce the temperature and cook the egg for a bit longer to give the whites time to firm up without overcooking the yolk.
Crispy or browned edges:
Sunny side up eggs should have tender edges. If yours are browning too fast, your pan is likely too hot. Reduce the heat and consider using butter instead of oil for a gentler cooking method.
2. Boiled Eggs
Boiled eggs are one of the most versatile ways to prepare eggs. They can be great options for snacks, breakfast, or incorporated into other dishes, like salads. With just a few minutes of cooking time, you can achieve everything from soft, runny yolks to firm, sliceable centers. The key is to get the timing right.
- Soft-Boiled (5–6 minutes): Whites are set, yolk is runny. Commonly used in dishes like ramen or served with toast for dipping.
- Medium-Boiled (7–8 minutes): Yolk has a jammy consistency. Great for grain bowls, salads, or as a snack.
- Hard-Boiled (10–12 minutes): Fully set yolk and white. Ideal for deviled eggs, egg salad, or meal prep.

How Do I Make Boiled Eggs?
Here’s how to get the texture you want:
1. Bring a pot of water to a gentle boil.
2. Carefully lower the eggs into the water using a spoon or ladle.
3. Set a timer based on your preferred doneness:
- Soft-Boiled: 5–6 minutes
- Medium-Boiled: 7–8 minutes
- Hard-Boiled: 10–12 minutes
4. Prepare an ice bath (a bowl of cold water and ice).
5. Once the eggs are done, transfer them immediately to the ice bath to stop the cooking process and make peeling easier.
Why Is My Yolk Green?
A green or gray ring around the yolk usually means the egg was overcooked. It’s harmless but can affect taste and texture. To avoid it, stick to proper timing and cool the eggs in an ice bath right after boiling.
How to Avoid Overcooked or Hard-to-Peel Boiled Eggs
Hard to peel:
Fresh eggs are harder to peel cleanly. Try using eggs that are a few days old, and roll them gently on the counter after boiling to help loosen the shells.
Rubbery whites:
This usually means the eggs were cooked too long. Use a timer and move the eggs to an ice bath immediately after boiling to prevent overcooking.
Overcooked or undercooked yolks:
Getting the timing right can take a little practice. Adjust the boil time by a minute or two next time to fine-tune the yolk texture to your preference.
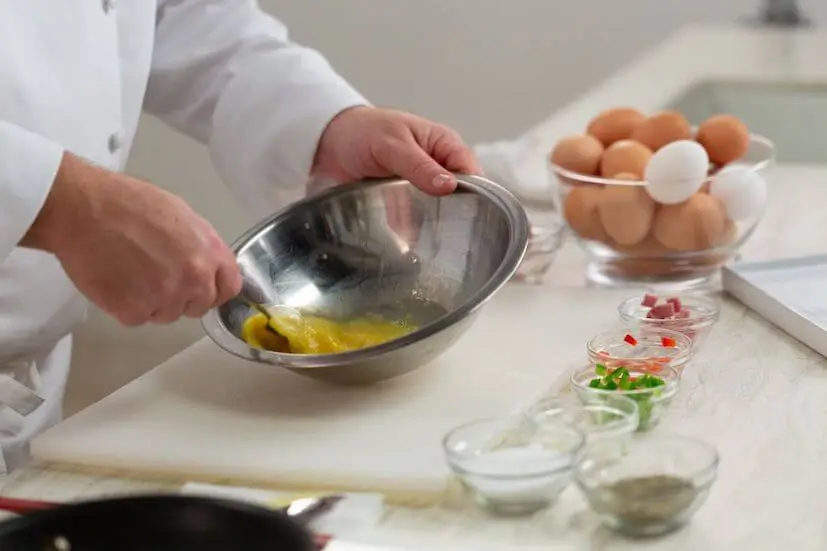
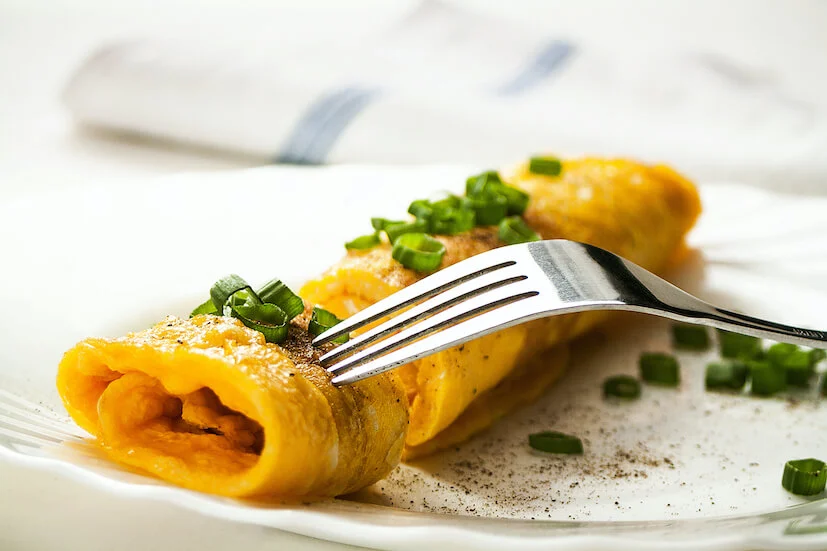
3. Scrambled Eggs
Scrambled eggs are one of the most beginner-friendly egg cooking styles. When cooked low and slow, they develop a soft, creamy texture that’s hard to beat. They’re also ideal for customizing with cheese, herbs, or vegetables, making them a go-to choice for breakfast or brunch.
How Do I Make Scrambled Eggs?
1. Crack the eggs directly into a cold nonstick pan and add a few cubes of butter.
2. Turn the heat to medium-low and begin stirring with a spatula.
3. Alternate 30 seconds on the heat and 30 seconds off, stirring constantly and scraping the bottom and sides to prevent overcooking.
4. Remove from heat while the eggs are still slightly soft—they’ll finish cooking on the plate from residual heat.
When Should You Salt Scrambled Eggs?
It’s a hot topic among chefs and home cooks alike. Some say salting too early makes eggs watery, while others argue that pre-salting creates a more tender, flavorful scramble. In tests from Serious Eats, eggs salted up to 15 minutes before cooking stayed moist and cooked more evenly. Still unsure? Try both and see which method you like best.
Why Scrambled Eggs Turn Out Rubbery or Watery (and What to Do)
Dry or rubbery texture:
This usually happens when the heat is too high or the eggs are left on the heat too long. Stick to low heat and remove them just before they’re fully cooked.
Watery eggs:
Adding milk or cream may seem like a good idea, but it can lead to a thinner, runnier texture. Try skipping the extra liquid for creamier results.
Bland flavor:
If your eggs are tasting flat, consider when you’re adding salt. Salting too late—or not at all—can leave them under-seasoned. Aim to add it once the eggs begin to set.
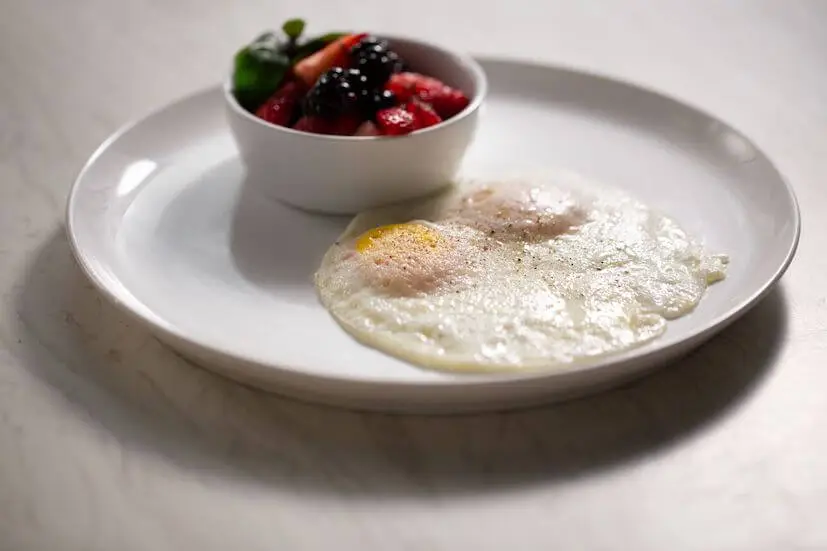
4. Fried Eggs
Fried eggs are a diner favorite for good reason. They’re quick to cook and easy to customize depending on how you like your yolk. Choose from over easy, over medium, or over hard to get the consistency you prefer. They’re perfect for topping burgers, rice bowls, or breakfast sandwiches.
How Do I Make Fried Eggs?
1. Lightly butter or oil the bottom of a pan and heat it over medium heat. Butter adds rich flavor and helps create crisp edges.
2. Crack the egg very close to the pan’s surface to avoid breaking the yolk.
3. Cook according to your preferred style:
- Over Easy: Season with salt and pepper. Once the white is set, gently flip the egg. Cook briefly on the second side to keep the yolk runny.
- Over Medium: Cook for 1 to 1.5 minutes on the first side. Flip and cook for an additional 30–60 seconds until the yolk is slightly firm around the edges but still soft in the center.
- Over Hard: Cook for 2–3 minutes per side. The yolk should be fully cooked through, with no runny center.
Fried Egg Troubleshooting: Sticking, Broken Yolks, and Overcooked Edges
Egg sticks to the pan:
Make sure your pan is fully heated and well-greased before adding the egg. A good nonstick or well-seasoned skillet works best.
Yolk breaks when flipping:
Use a wide, flat spatula and flip gently. For over easy and over medium eggs, flip as soon as the whites are set to avoid overcooking and cracking the yolk.
Edges are too crispy or burnt:
If the edges are browning too fast, your heat is too high. Lower the temperature and use butter for a more even, tender cook.
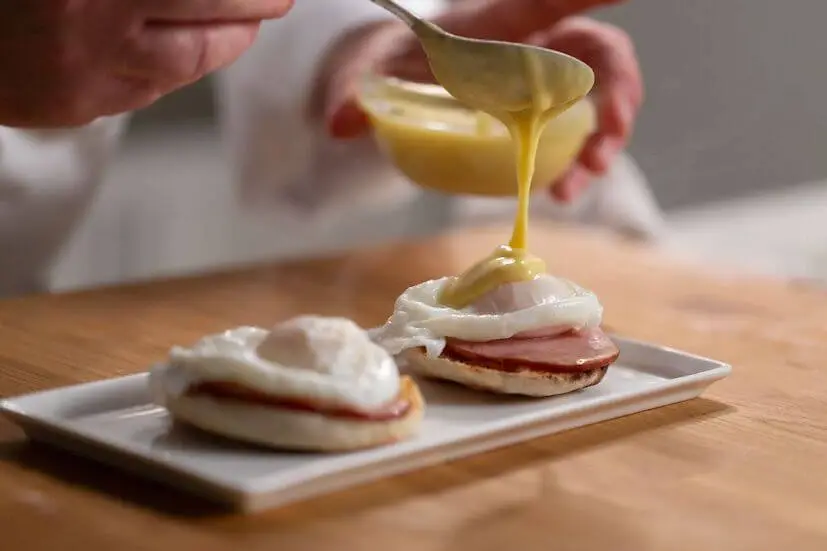
5. Poached Eggs
Poached eggs are light, delicate, and made without any added fat—perfect for a refined breakfast or brunch. While they can take a bit of practice, the result is worth the effort. You’ll often see them served over an English muffin with Canadian bacon and hollandaise sauce in the classic dish, Eggs Benedict.
How Do I Make Poached Eggs?
1. Bring water to a gentle simmer in a pot and add a little vinegar to help the whites stay together.
2. For a cleaner poach, you can strain off the loose outer egg white, but it’s optional.
3. Stir the water to create a vortex, then gently drop the egg into the center. The swirling motion helps the egg wrap around itself.
4. Let the egg cook for 2–3 minutes, or until the whites are set but the yolk is still soft.
5. Use a slotted spoon to remove the egg and gently blot with a paper towel before serving.
Poached Egg Problems: Runny Whites, Sticky Eggs, and More
Whites spread out in the water:
Use very fresh eggs and add a splash of vinegar to the water. Straining off the thinner part of the white can also help.
Egg sticks to the pot:
Make sure to stir the water before dropping the egg in. The vortex keeps it in motion and helps prevent sticking.
Overcooked yolk:
Keep a close eye on the clock. Poached eggs cook fast—test one egg first to find your ideal timing and texture.
6. French Omelet
A French omelet is all about finesse. It has a smooth, pale surface with no browning and a soft, creamy center. This style skips fillings during cooking and is often finished with just a sprinkle of herbs or a touch of cheese, making it a more refined and elegant breakfast option.
Omelet Styles at a Glance
| Type | Texture & Look | Filling Style | Cooking Method |
|---|---|---|---|
| French Omelet | Smooth exterior, soft and creamy inside | Minimal or added after cooking | Stirred constantly over low heat, gently folded |
| American Omelet | Fluffy with some browning | Added before folding | Cooked more still, flipped or folded once set |
| Western Omelet | Firm, browned, hearty texture | Cooked with ham, peppers, onions, and cheese | Ingredients pre-cooked, then folded like a taco |
How Do I Make a French Omelet?
1. Crack 3 eggs into a bowl and whisk with a fork (not a whisk) to avoid creating too many air bubbles.
2. Heat a nonstick pan over medium-low heat and add 1–2 small squares of butter.
3. Pour in the eggs and stir constantly, scraping the bottom and sides of the pan to prevent the eggs from sitting in one place.
4. If the eggs begin cooking too quickly, lift the pan off the heat briefly to slow the process.
5. Keep stirring until the eggs are mostly set but still slightly soft and jiggly on top.
6. Gently move the pan to finish setting the surface. Add any optional fillings or seasonings.
7. Carefully fold the omelet in thirds and slide it onto the plate with the seam side down.
Common Mistakes When Making a French Omelet
Brown spots or overcooked edges:
French omelets should be pale with no color. Keep the heat low and stir continuously to avoid hot spots or burning.
Eggs don’t fold smoothly:
Make sure you’re using a nonstick pan and scraping the sides as the eggs begin to set. This helps create clean edges for folding.
Too firm or dry inside:
Take the pan off the heat while the center is still slightly soft—it will continue to cook as it’s folded and plated.
7. Western Omelet (aka Denver Omelet)
The Western omelet—also known as a Denver omelet—is a hearty, all-in-one breakfast that’s packed with flavor. Unlike the smooth and delicate French omelet, this version is browned, firm, and filled with savory ingredients like diced ham, onions, bell peppers, and cheese. It’s a satisfying option that feels right at home in diners and weekend brunch menus.
How Do I Make a Western Omelet?
1. Crack 3 eggs into a bowl and whisk until fully blended.
2. Melt butter in a nonstick pan over medium heat.
3. Pour in the eggs and cook until mostly set, scraping the bottom and edges to prevent uneven cooking.
4. Once the eggs are firm, add pre-cooked fillings like ham, onions, peppers, and cheese.
5. Fold the omelet over like a taco or in half, then slide onto a plate and serve hot.
Common Mistakes When Making a Western Omelet
Omelet tears when folding:
Be sure the eggs are fully set before folding. If they’re too soft, they’re more likely to tear.
Undercooked fillings:
Cook hearty ingredients like onions or peppers ahead of time to ensure they’re tender and flavorful before adding them to the eggs.
Overcooked or dry eggs:
Avoid high heat and take the omelet off the stove as soon as the eggs are set. They’ll continue to cook slightly after plating.
Egg Substitutes to Use When You’re Out or Avoiding Eggs
While exploring different egg cooking styles is a great way to expand your skills, there may be times when eggs aren’t an option—whether due to dietary preferences, allergies, or cost. With egg prices affected by recent inflation, some cooks are also looking for more budget-friendly alternatives.
Luckily, there are several egg substitutes you can try in your cooking:
- Liquid egg substitutes – Often made from egg whites or plant-based ingredients like mung beans or soy, these products are designed to scramble, fry, or omelet.
- Silken tofu – When crumbled or blended, it can take on a similar texture to scrambled eggs and can work well in breakfast bowls or stir-fries.
- Chickpea flour mixtures – Combine with water and seasonings to create a batter that can be cooked into a protein-rich scramble or eggless quiche.
- Powdered egg replacers – Often used by campers or in emergency food kits, these shelf-stable products can be rehydrated and used in cooking or mixed into savory dishes.
While these substitutes won’t mimic eggs in every context, they’re useful to have in your culinary toolkit. Choosing the right substitute depends on the dish, so don’t be afraid to experiment and see what works best for your needs.
→ Read this next: Best Egg Substitutes for Baking and Cooking (and When to Use Each One)
Explore Egg Cooking Styles in Your Own Kitchen
Learning a few simple ways to cook eggs can make everyday meals feel more satisfying—and even a little impressive. Whether you’re flipping a fried egg, swirling a poached egg, or gently folding an omelet, these egg cooking styles give you the chance to slow down and build real technique, one step at a time.
If you’re ready to grow your skills even more, consider exploring a program at August Escoffier School of Culinary Arts or join one of our flexible online cooking classes. Whether you’re learning for fun or looking toward a professional future, there’s a path for you.
Want to continue developing your cooking skills? Check out these articles next!